So if you got into the habit of using G94 Facing Cycle CNC Turning.
When you want to add more cuts it’s easy, piss easy.
So if this blank had 3mm on the face it’s really easy to add some more cuts.
G94 Facing Cycle CNC Turning
Oh just one other thing
This cycle is modal. Notice how all we did was add some Z figures and it just did the facing.
Well just like your wife when you got drunk 15 years ago and urinated in the bed. Well……
It remembers.
So that means we need to stop it. Just by adding a rapid command G0 or G00. It stops. It forgets.
Oh and don’t try n space the code out here because if you leave an extra block in it will face the part again.
I think I need to be honest with you here and confess that until recently I have never seen the point of this G94 code. But now I have seen the error of my ways and I think this demonstrates just how useful it can be.
Now I know some smart prick will say “Oh well I just use G71” . Yes that’s fine but don’t you think it is rather complicated just to face the front off a part that’s too fuckin long?
On a Fanuc or Haas control G02 G03 are the two G codes we use to move around clockwise and counterclockwise circles. You don’t need the leading zeros so from now on I will call them G2 and G3.
And by the way never use the letter O it’s number zero
GO2 GO3 looks almost exactly the same as G02 G03. But your control will blow it’s mind and get real mad with you.
It will also do some really weird shit like trying to start a new program. Anyway just don’t do it.
Oh and please don’t call it interpolation as it annoys the shit out of me.
Linear interpolation is movement in a straight line.
Circular interpolation in moving in a circle.
Interpolation is movement.
30 five star ratings on Google (just saying)
Now that’s the telling off out of the way let’s move on. It’s ok I don’t hold a grudge.
Which one of you bastards said interpolation?
Let’ Talk About Milling A Shape
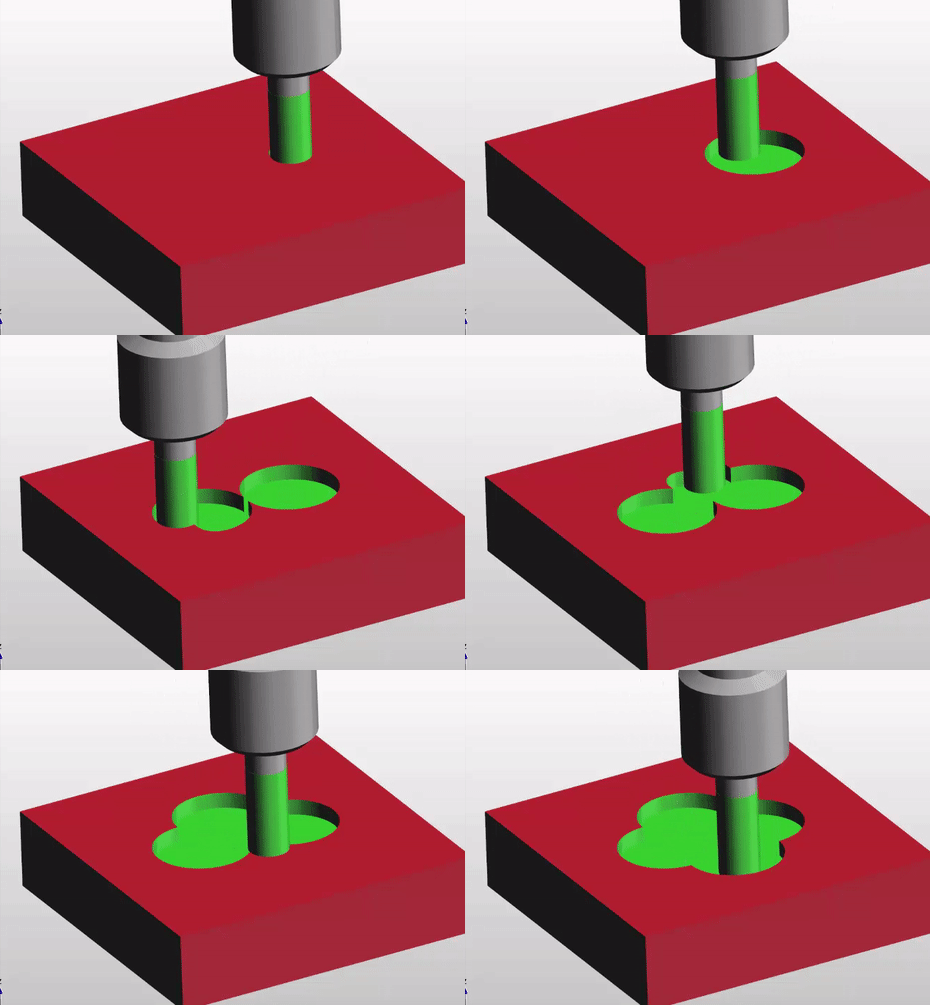
When you are milling a shape and you want to move in a circular motion you use G2 or G3
For a clockwise arc use G2 and for a counter clockwise arc use G3.
They both work the same way. On a modern control you programme the endpoint (an XY figure on a milling machine) and the radius you require.
Then your CNC controller magically creates your circle. You can programme any arc like this with one exception.
Do you know what it is?
Ok I will tell you later, it’s OK to not know. (Just means you are little thick).
Lets go back to school.
Remember construction? Of course you do.
We are going to mill the top section of this part
Let’s see what the control has to do to work out where the centre of the circle is.
It knows its current position and in your G3 line you tell it the end point and the radius you want.
Well it gets out its little compasses and draws two circles at the radius you told it.
It positions the compass first on the start point and draws an arc. Then on the end point and draws an arc.
Where these two arcs cross it places the point of the compass. Now it can strike an arc that touches your start point and your end point.
Get yourself a pair of compasses and try it. It’s great fun.
That’s how the maths works.
Tell me did you really believe that inside your CNC machine there is a little man with a pair of compasses?
Fuckin hell I give up.
Sorry I lied it’s all done with simple trigonometry. But at least I tricked you into understanding the principle.
So you should now begin to work out why you get an alarm when the radius is too small. Your two arcs just don’t cross. In other words you are trying to fit an arc between two point that simply miss one another.
G2 G3 No Pot of Gold
Your control will give you an alarm “End Point Not Found” which makes sense because it can’t find one. It’s like the pot of gold at the end of the rainbow.
Oh Before you Go More on G02 G03
What about the question. When can you not use endpoint and radius with G02 and G03 ?
Answer: When you want to machine a full circle using G02 and G03.
You can do it but you would have to break it into two halves. I’m not going to explain anymore because this method is for wimps and peole who can’t be arsed to read my articles.
You know who you are, ordering Chicken Korma in an Indian Restaurant.
Well…… what follows is a full, blow your bollocks off, shit your pants the next day, vindaloo.
And Now Ladies and Gentlemen the Infamous I and J
At the CNC Training Centre we don’t get too excited about I and J when it comes to programming circles. That’s because you don’t need to worry your pretty head about it anymore. You almost never need it.
Did he say almost?
Well yes almost. You could programme forever and never bother about using I and J with G02 G03. So just go off and watch some porn for awhile and I will explain to the real programmers when you can use it.
In the old days I and J was the only way to programme an arc. You would tell the control where the centre of the circle is and the endpoint. This is cumbersome and a bit tricky. That’s why I’m not telling you about it.
Anyway one really good simple way to use I and J is for a full circle. Oh and it’s bloody easy. That is once I’ve explained it to you.
When I was a boy hundreds of years ago I had a toy called a Spiro Graph.
Spirograph those were the days
It consisted of a series of plastic gears. You stuck your pen in a hole in the gear and rotated it around another gear. With a bit of practice you could make some really nice pictures. Kept us happy for hours. The crime rate dropped dramatically in my area when these things came out.
What’s this to do with CNC programming you ask? Well if you tried to use end point and radius for a full circle this is what you would get:
If your start point was X0 Y0 you would program G3 X0 Y0 R100. assuming radius was 100mm.
So in a full circle your endpoint is the same as your start point. There are millions of circles the computer could pick. It would be just like the shapes above. If you do the compass trick you will see what I mean. That’s why it’s impossible.
In Comes I and J
So some clever bloke thought fucks this I’ll invent I and J.
If we use I and J there are four options as above.
You would simply program as below for a full circle (20mm Radius)
G3 I-20.
G3 I20.
G3 J20.
G3 J-20.
And that’s it.
So these are the four options
So there you have a fantastic way to programme a full circle without having to break it down into two halves or be clever like a newsreader or some twat off mastermind.
Why do you only need the I and not X and Y Dave?
For fucks sake don’t call me Dave my name is David.
I had this really nice guy phone me from Africa the other day. He explained to me that he needed to get his inheritance of 10 million pounds out of England and if I helped him he would give me £20,000. All I had to do was give him all my bank and credit card details. Oh and a small one off payment of £1000.
Of course I agreed, what a bargain. Just as I was about to do this the cheeky bastard called me Dave.
I immediately told him to fuck off. I just hate being called Dave.
I gave him my 96 year old mothers phone number because I thought at least she can benefit from it all. Her name is Mary so he couldn’t shorten that. She only has £1200 in savings so it would be doing her a massive favour.
Explanation
You don’t need to re-state the X and Y because you are already at the endpoint
Joking aside please don’t be arsed to learn a load of M Codes you will probably never use.
Some M codes That “Might” be Useful
Open Chuck (Might be M11)
Close Chuck (Could be M10)
Parts Catcher Up (Mmmmm)
Parts Catcher Down (No idea)
Well Commented Programs
Try to put M Code descriptions in your program. That way you won’t need to keep looking them up. A part transfer on a CNC Lathe is a good example, there are an absolute shit load of em.
They are everywhere. If you put a meaning to each one in brackets it will make proving the program out really easy. Oh and if you have a CAM system then change your post processor to output them for you.
M11 (OPEN CHUCK)
M10 (OPEN CHUCK)
etc etc
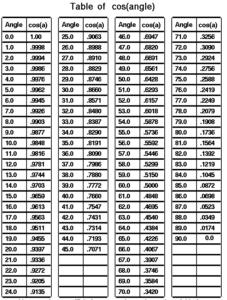
I once had a boss once who actually learnt sines and cosines of angles.
Cosines of Angles
Holy shit I mean it’s fuckin impressive and I must add in the 1970’s it was actually worth doing because we didn’t even have calculators. We just had bits of paper, pencils and Ford Capris.
The Market Online Classic Car Auctions
Mine was just like this but mine was a P reg three litre, vinyl roof handled like a cow on a march. Very fast at the time. Dream car, loved it.
Hope you enjoyed reading my article on CNC Turning M Codes.
Please remember that it keeps me occupied and while I’m writing these articles I am not holding you up in the supermarkets queue trying to find a coupon for 10p off my incontinence briefs.
M99 Plus Block Skip, M99 on a Fanuc, Haas or Mazatrol ISO control can be used to jump sections of code.
Learn to use this in conjunction with the block skip command to switch it off and on.
Now I know you are all thinking “Dave you’re wrong it’s the end of a sub-program”. (Please in the name of holy shit do not call me Dave.)
Well you are right and you are wrong.
Yes it means continue and is used at the end of a sub program.
But it also has another nifty use.
Imagine you want to skip a complete section of program in the case below it’s the Spot Drill.
Let’s See Some Crap Ways Of Doing This
(If you want to do this on a Toshiba Tosnuc 888 or similar control go to the end of the article)
In this example it’s a spot drill we want to miss out.
Standard Code
You could delete it and make two programmes (sounds like hard work and loads of errors). Not to metion wear on your finger tips. Truth is it’s just a shit way to do it.
Block Skip
The programme above contains BLOCK SKIPS sometimes called BLOCK DELETES.
When you switch on your BLOCK DELETE/BLOCK SKIP switch, each time a forward slash (/) is seen that block will not be processed and the control will move on to the next block.
On most Fanuc controls it’s B.D.T not to be confused with CBT (Cock and balls torture) please do not google this in company time.
It works ok but it is very time consuming. If you want to skip a big section of code you will have to write in loads of block skips.
Call me a lazy bastard but I definitely couldn’t be arsed with that.
Some controls even have two three and four block skips so you can switch on any combination of these switches, mmmm complicated. Good luck with that one.
Do You Have Adequate Life Insurance?
M99 CNC Code (Now let’s use it)
The next example is the easiest way.
You probably normally see an M99 at the end of a sub programme.
In the case below it tells the control to jump to N100 (M99 P100).
The P part is the N number you want to jump to.
M99 P600 (Jump to N600) M99 P6666 (Jumps to N6666)
M99
If you put the BLOCK SKIP/BLOCK DELETE on it will not jump the spot drill.
You would have a choice. If you temporarily want to skip a section of code.
Be careful what N Numbers you choose so as not to mix them up.
Maybe you broke all the taps and you don’t have anymore so you want to skip the tapping. In this case I’d just jump with M99 and then take it out before saving the program.
However, see the next Example.
For this last example you might have to think a bit. Call me finicky but I like the BLOCK SKIP/BLOCK DELETE as a default to be off.
Most machines now don’t have a mechanical switch for BLOCK DELETE/BLOCK SKIP so when you turn on the machine block skip will always be off.
That means the default would be to jump the code.
My way of looking at it, is that you would want the default to be running the whole program as normal.
So We Are Agreed
The default should really be the way the programme was originally done.
In the example below if the block skip is off, which it will be when you start up your machine.
The first thing it will do is jump over the bit that tells it to jump the code.
Meaning it runs as normal not jumping any tools.
The Clever Shit (M99 Plus Block Skip)
What’s This?
Now I know this is a bit confusing and maybe I didn’t explain it too well. Trust me it works.
What’s the matter with you lot just take some time to fuckin read it.
Sorry I’m losing my temper a bit here, the dog’s just pissed on the TV remote again. Just read through it a few times and the penny will drop.
To do this you must have the Macro Option if you don’t then this is where M99 comes in handy.
Best way to see if you have macro is to try using it in MDI.
In MDI Type in #1=6 if you have macro it will work if you don’t you’ll get an alarm and your machine will self destruct in 15 minutes.
Jumping Sections of Code on a Toshiba Tosnuc 888 or Similar
This is how you do it on a Toshiba (the blue bit).
Don’t forget it’s GO (that’s G and letter O) not G0 which is G and number zero (Rapid Command).
Don’t get your letter O’s and your number zeros mixed up.
/M99 P50/[GO,50] (JUMP TO N50) M99 P100 [GO,100] (JUMP TO N100) N50 N50 (ARRIVE HERE THE CODE THE CODE THE CODE ETC ETC ETC ETC N100 N100 (ARRIVE HERE)
Without Fancy Shit (Just jump some code)
M99 P100 [GO,100] (JUMP TO N100) THE CODE THE CODE THE CODE ETC ETC ETC ETC N100 N100 (ARRIVE HERE)
If you have macro you can do a similar thing on Mazak, Haas or Fanuc.