Haas ST30 Tool Offsets – X, Z and G54 Setup
CNC machines are like children to me. I love them all but in different ways, now I am lucky in that I do get to walk away from these machines after training my victims for a few days. With children it’s a bit different and like me when you have twelve it’s almost impossible.
I would love to sit down with some CNC bloke and create the perfect CNC machine. I mean for example none of then have a mirror just in case you want to check your hair looks ok in between setting offsets. Oh and don’t get me started on coolant tanks some of them are impossible to piss in and you end up with a long walk to the toilets.
No I am not going to produce some stupid AI picture at this point so don’t ask, do it yourself if you really need to.
Coolant Tanks Haas ST 30 Lathe
This article is not about the logistics of pissing in coolant tanks so lets get on with it.

By the way AI took this a lot more seriously than I did.
ST 30 Haas
I recently worked on a Haas ST30 and boy was it fun, simple two axis lathe with a C axis and driven tools. That means you can do loads of shit on the front face, mill shapes, drill tap holes.
Radially its basically “Jack Shit” well not exactly, you can drill radial holes. If you don’t know what radial means it is holes around the outside.
As a foot note I’d like you to stop reading my articles too because I want to attract a better class of readers. You wouldn’t believe some of the dumb ass shit people who have been reading my articles of late and I need them to just go and watch kittens running around the kitchen floor on YouTube
Y Axis
If you want to do serious radial shit like slots an outside pocks then you need a Y axis this puts a lot of cost on the machine and that’s why you have machines like the one I’m talking about today.
The machine I worked on did not have a tool measurement arm which most Haas lathes do have. They are very good but today I don’t have one. What the fuck, let’s do this shit. Tool arms are for weak people with no moral fibre. (Moral fibre, I think it’s in Bran Flakes)
How to Set Haas ST30 Tool Offsets Using Cut and Measure
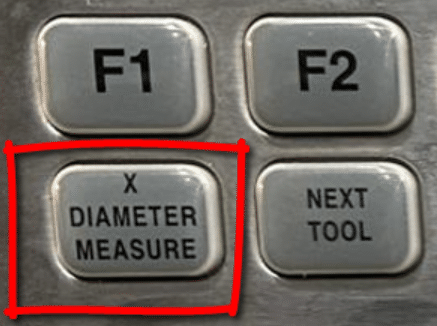
So now children we need to use these buttons.
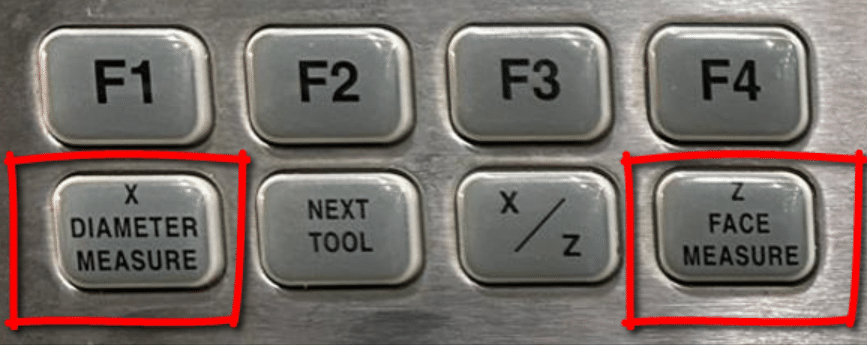
Cut and measure means that we are going to tell the machine where the tool is. If you are used to doing this on a Fanuc control you will find this a bit strange initially.

Sorry I didn’t want to do it but my customer works in INCHES so you need your “25.4” head on.
Let’s go. Firstly machine your diameter and move the tool away in Z only, definitely not in X.
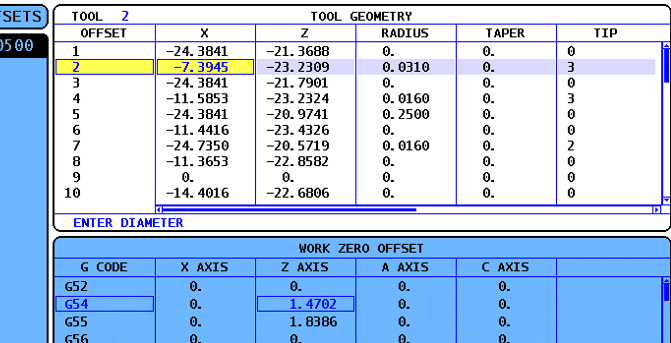
Go to the correct tool offset
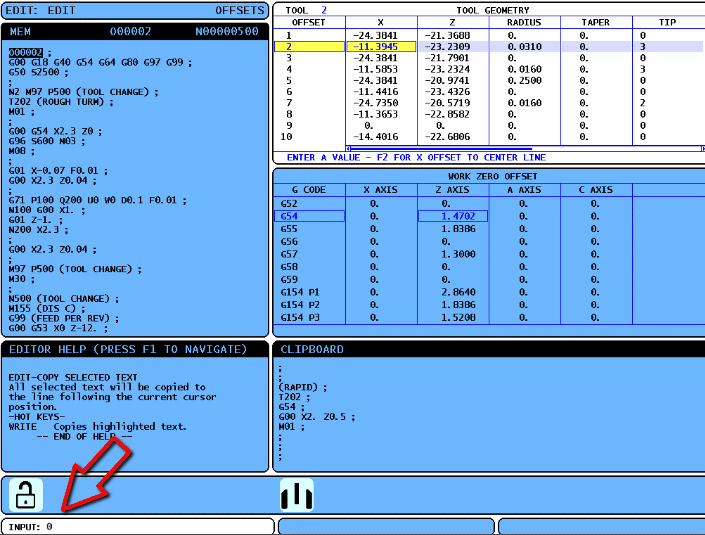
Input zero then press F1

This will zero the X offset
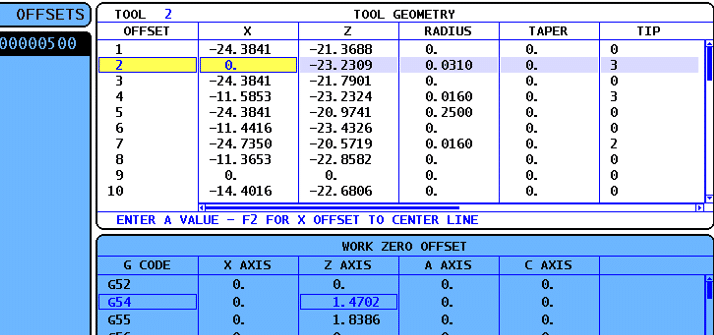
You don’t have to do this but it makes it easier to see the change when you press this.
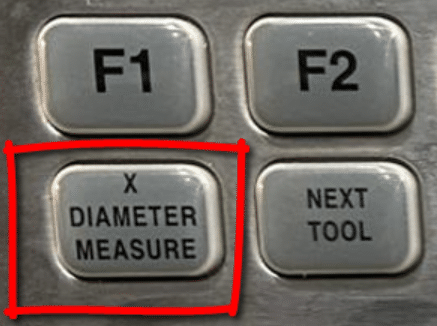
This will enter your current machine position, this is the distance from zero return in X
 .
Now something really annoying happens.
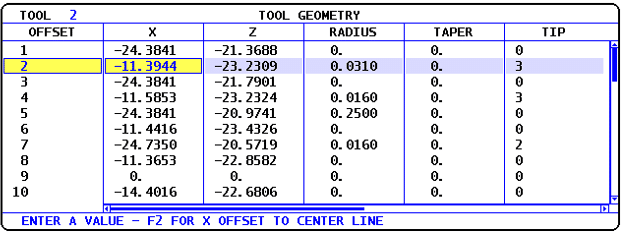
It fuckin remembers the last number you entered so you need to cancel it and then enter the diameter of your part. Who’s idea was that?
It’s a bit like internet history but lot less embarrassing if your mother sees it.
Gene Haas is fuckin brilliant so I’m sure it couldn’t have been him. Help me Gene you don’t need this shit.
Anyway delete this and write in the diameter you just measured.
When you press input it adds this to the machine position that you recorded earlier when you pressed this.
Remember?
Job Done
Handwheel
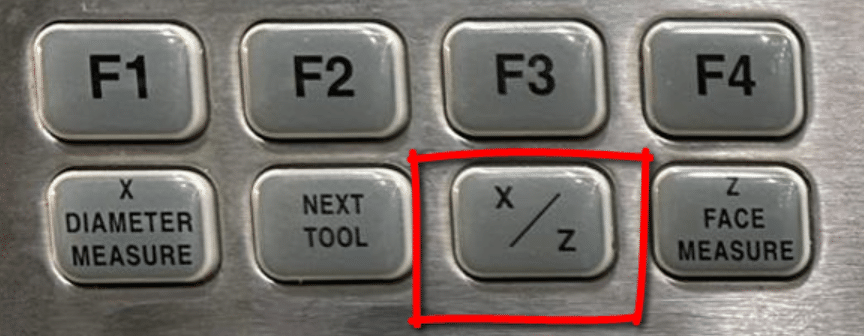
Something you may or may not know is that you can use this button to switch from X to Z in hand-wheel.

It’s one of those things if you make yourself do it you will save time in the long run.
Instead of changing hand-wheel axis with these.
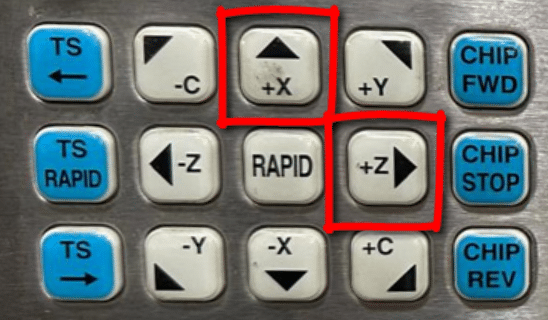
Use This
Setting Z Haas ST 30 Lathe
The best way to set Z is to set all the tools from a given point. We used the back of the chuck and a setting block. We zeroed the setting block and you can just wind in your tool until the clock reads zero.
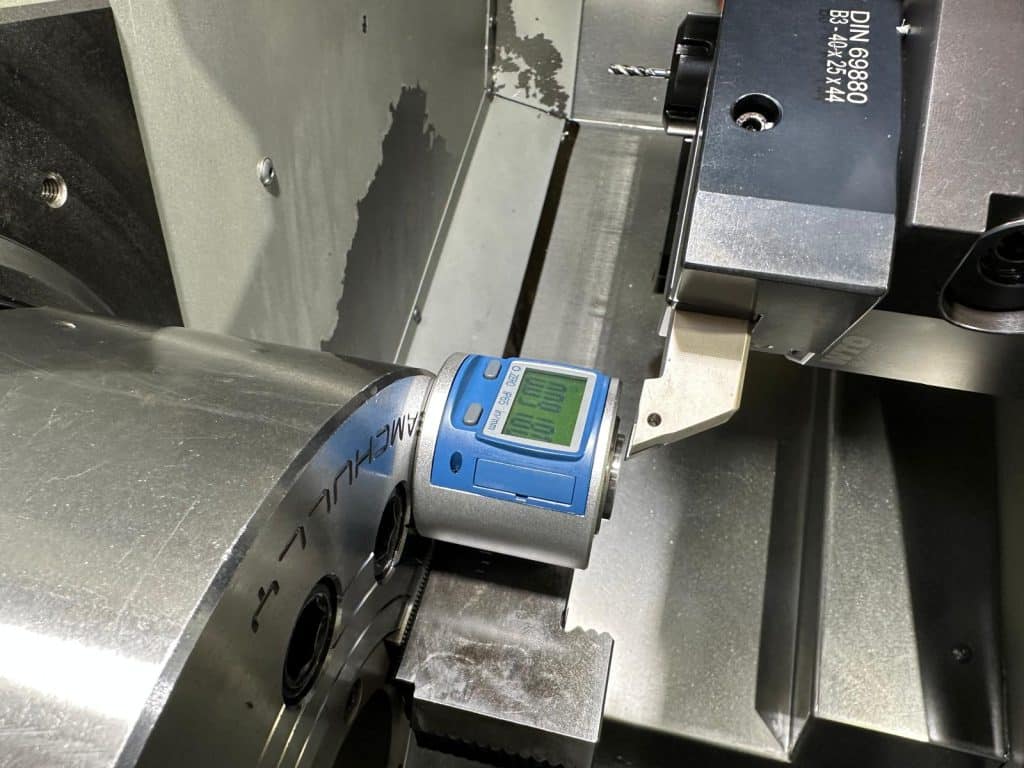
Again you can input zero into your tool offset before you enter the figures. This just makes it easier to see. How often have you thought “oh I didn’t see that change”.
Obviously if you zeroed it you will know it has changed.
So having wound the tool in until the clock reads zero select each tools offset. Press this.
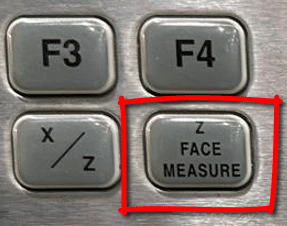
This will record the distance from zero return in the Z axis.
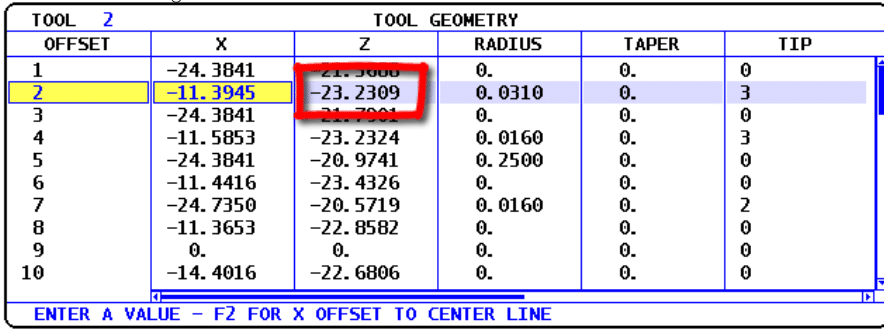
Set G54 Work Offset
So now to set the G54 work offset you measure from this gauge point to the front of the part.
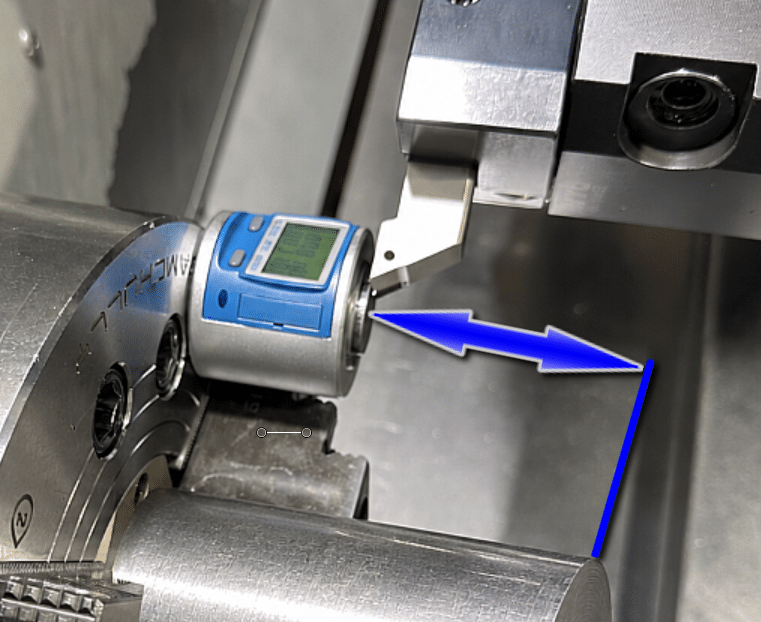
The way to do this is to call out the tool in MDI.
Make sure the turret is in a safe indexing position.
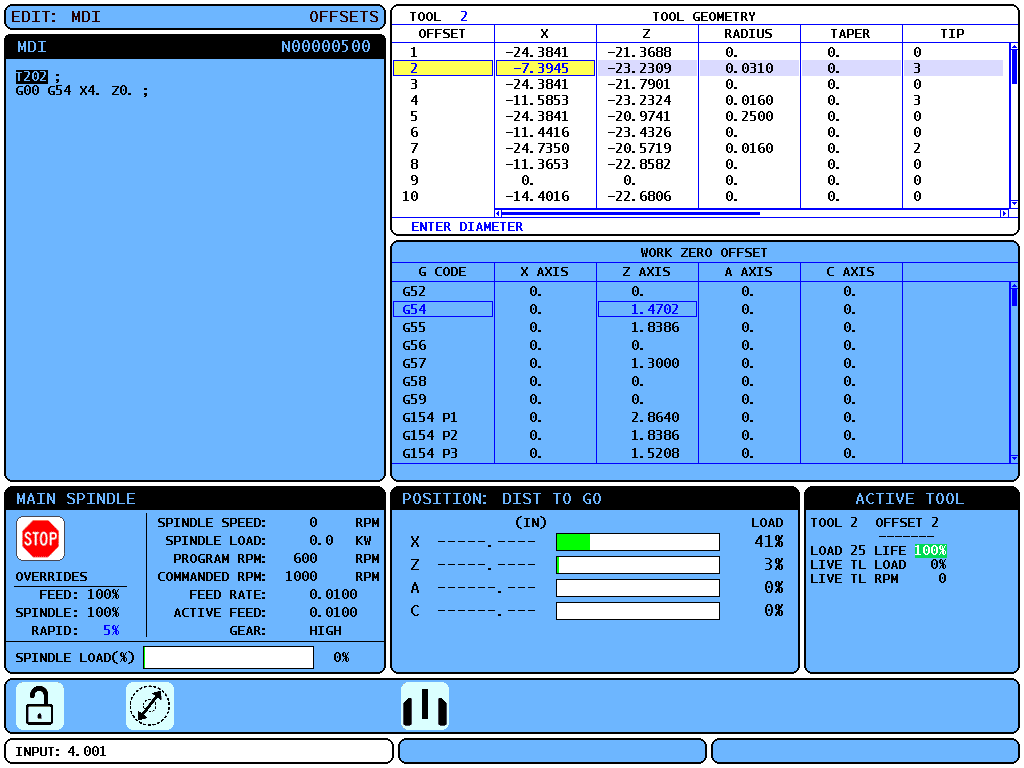
T202 ; then press cycle start.
This will activate the tool offset. Now position this tool at the front of the part where you want your Z zero.
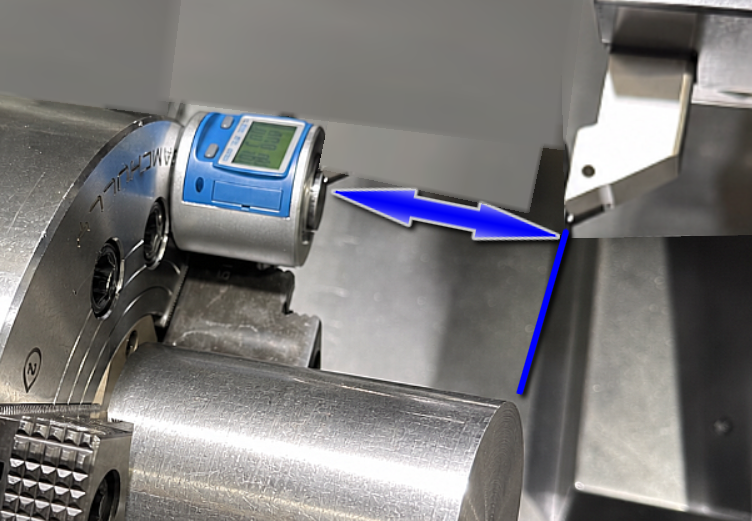
Move your cursor to G54 (Z AXIS)
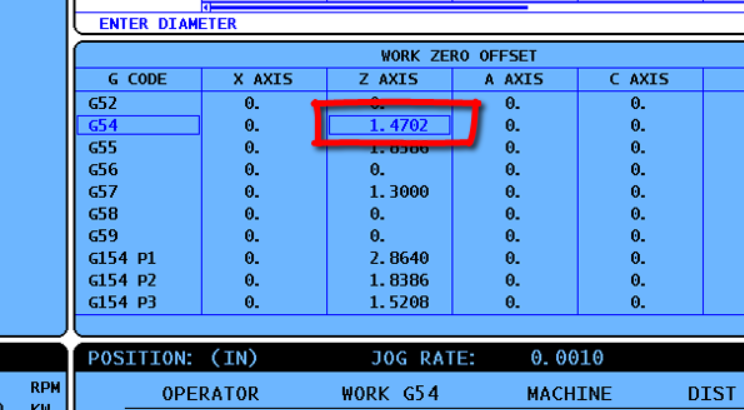
Now when you press Z Face Measure it will calculate this distance for you and write it into your Z offset.
Easy Wasn’t It, W’ere All Set To Go
The Good Shit
To be honest once we got used to the different way of setting the tools it wasn’t too bad. Now let us talk about the driven tools.
I haven’t trained anyone on a Haas Lathe for a while and the last one didn’t have driven tools. There is one other thing and that is I have a shit memory in fact I have met goldfish with better memories than me.
Just a quick question, how do they know Goldfish can’t remember stuff?

I wasn’t looking forward to milling on the front of the part using G17 XY plane and G112
Why you ask? Well because it is so complicated and it confuses the shit out of most beginners. Basically you programme it the same as a three axis mill except you double the X figures and swap Y for C.
Fuckin confusing and when you add G2 and G2 to the mix it’s horrendous.
Back to the goldfish stuff yes I admit I forgot. Gene Haas doesn’t swear much bet he probably said “Fuck this is shit, I’ll just programme it like a fuckin god dam three axis mill.”
So That’s What He Do
Just add G112 and imagine your a three axis milling machine. On most controls once you go into G112 you can’t use any G00 moves (rapid). Guess what on a Haas Lathe you can. It is so simple.
There are loads of great things on this machine and I will be writing more.