Siemens Mixing G Code With Shopmill is Easy
Category : Siemens
CNC Training Call David: 07834 858 407

Category : Siemens
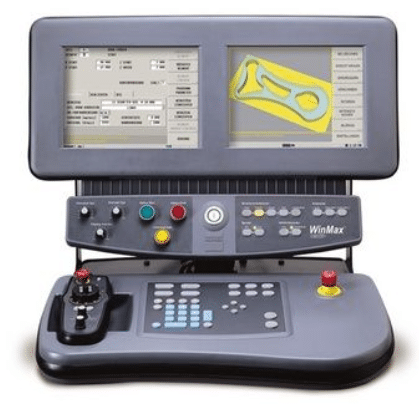
Category : Hurco
Hurco Converting MM to Inches, they say in life it’s the little things that matter. Well it’s an interesting thought. Doesn’t bode well with the bank manager when you only have 10 quid in your account but then that’s another story.
Anyway here is a little thing about a Hurco control that is really useful. One of the things I always teach my pupils, or victims as they are sometimes called is this.
Always let the computer do the simple maths, us humans are basically shit at maths especially when we do it in our heads. So when the CNC Control offers to help out, let it do it.
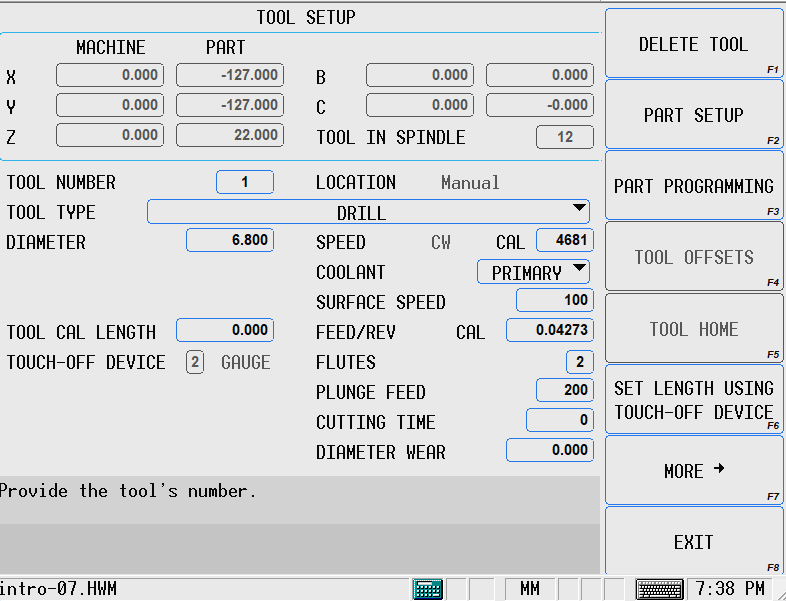
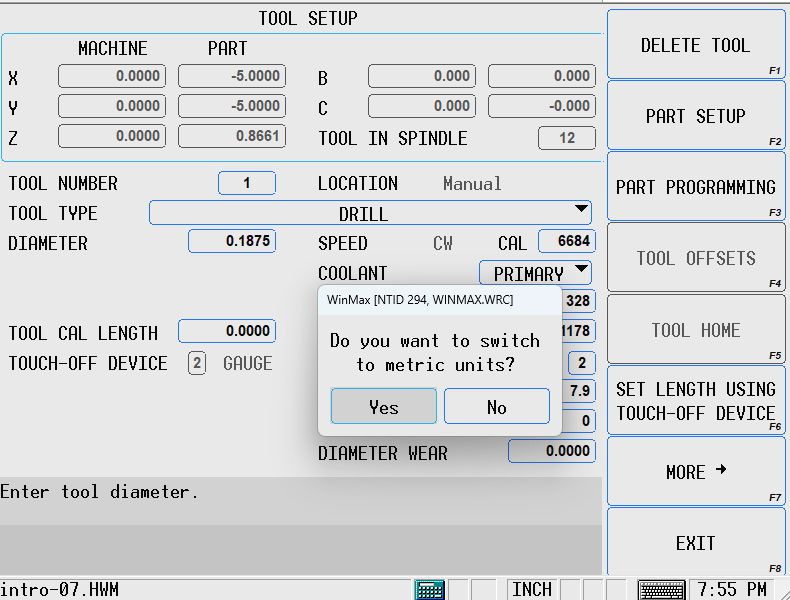
Above I am creating a tool and it’s a 3/16 inch endmill. First of all I’m going to change to inches. I click that little button MM down the bottom there.

Yes MM that’s little beast.
Hurco Converting MM to Inches, you will now get a warning
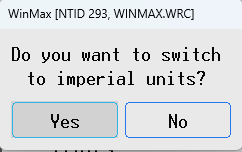
Imagine it’s the wife and just ignore it, well say YES, you know like you always do.
Your display will now turn to inches by complete magic. Your ok this is not a F****, the control is not about to simultaneously destruct.
Everything just went to inches. So exciting, I mean really it’s no big deal but if you are used to other controls then I’m afraid it fuckin is a big deal.
Now just type in 3/16 and press ENTER
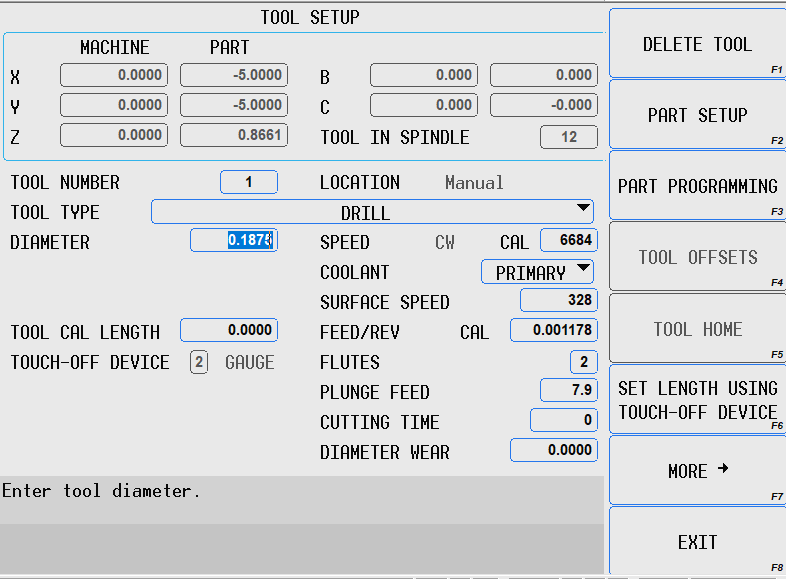
Guess what it came up with 0.1875 wow wow wow.
Just one other thing, Press the INCH button, and it goes back to MM.
And it’s back to MM
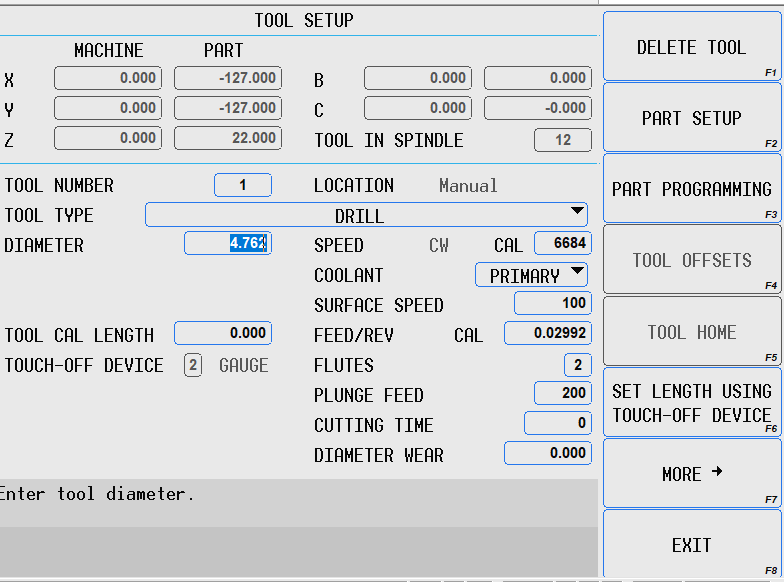
Soooo 3/16 of an inch is 4.762 mm
Hurco Converting MM to Inches, no brain power used.
Now all you old school types are saying “when I was a boy we didn’t have calculators. I say “shut the Fuck up cos now we do”
Listen folks in my school we only had one fuckin abacus and that was kept in a vault and only got it out on a bank holiday.
The point of this is that you don’t make any silly mistakes.
Use for every calculation plus, minus, divide everything.

If you have been offended in anyway by this article please accept my appologies as I’m in a foul mood. The dog has shit in my sandwich box again.
Category : Siemens Siemens Mill Siemens Turn
Writing Siemens Work Offset From Your Program

On a Fanuc control it is quite common to use G10 to write your work offsets (G54 to G59) from your program. It has many advantages the main one being that no-one gets to mess with your precious work offset once its set.

If some prick comes along and changes it, you don’t have to give a flying monkey shit. Your Siemens Work Offset is safely locked away in your CNC Program.
Oh and you get to do shit like this
Well if you ever lie awake at night thinking “how is that done on a Siemens control” I’m going to give you the answer. I often had these thoughts so you are not alone.
But then one day, not long back, someone asked me outright “How’s it done” once I got over the initial embarrassment of being asked such a direct question I told em.
Well first let’s say there is no such thing as G10 on a Siemens control.
You use this $P_UIFR[1] to write your Siemens Work Offset. The 1 being G54 and 2 G55 you can take this right up to G599.
Beware you are in the adult section now, messing with system variables.
Let me say “I fuckin love Siemens controls” there you go I’ve said it.

But, and a massive but it is, you get the syntax wrong on this and all hell will break loose. Not only will your CNC Machine explode in your face but when you get home your partner will be shagging the window cleaner in the remains of your burnt down house. So beware before you press that button to write your Siemens Work Offset.
You need loads of commas just put em everywhere and you wont go wrong.
This is how it looks:
$P_UIFR[1]=CTRANS(X,100.,Y,200.,Z,300.)
This will set X100. Y100. and Z300.
While we are on the subject, you can also read the work offset figures back into R values. You can then keep these and do what you want with them. Maybe sell them to a friend for profit, the choice is yours.

The 1 just after the square bracket is for G54 (2 would be G55) then give the axis in our case X Y and then Z
R1=$P_UIFR[1,X,TR]
R2=$P_UIFR[1,Y,TR]
R3=$P_UIFR[1,Z,TR]
The video below shows R1 R2 and R3 set to zero, after reading the program it extracts the offset figures G54 X-100. Y-200. and Z-300. and puts em in R1 R2 and R3 variables.
So there you have it setting you Siemens Work Offset.
Easy isn’t it.
You’re a big boy now playing with system variables but just remember “with great power comes great responsibility”