Month: January 2026

Hurco CNC Training

Call David: 07834 858 407

for Hurco training

Hurco CNC Training

Hurco CNC Training, Part Offset Buried in the Program

Good news, you don’t have to lose your Part Offset when you forget to save your program.

I have got to say I love Hurco machines, I mean I really fuckin do. Not in that way you say when your are out with your mates, totally shit faced and you keep saying “I love you man”. No no no this is true love.

I do have a tiny moan, well a few tiny moans, but not many.

CNC Training Centre can offer training on Hurco machines so contact us if you need Hurco CNC Training or in fact any CNC Training

One of them is that your work Part offset is on a separate screen and when you change programs if you forgot to save the one you were working all of hells shit will break lose.

Hurco CNC Training

That little exclamation mark should be six feet tall in my opinion, ignore it at your peril.

“Read More”

Siemens 840D Circles G02 G03

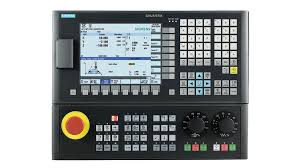
Siemens 840D Corner Rads and Circles

Siemens 840D

Siemens 840D. When I was at school they taught us, among a few other things, the rule: I before E except after C.

Click here for Siemens training.

Well I never took it in because I can never remember how it works with Siemens. Anyway let’s forget spelling bollocks and get on to the exciting stuff of CNC Programming.

Siemens 840D is an amazing control it’s so versatile. I honestly think that if you could find the right G code it could make you a one shot skinny latte with a shot of caramel syrup. No I’m joking it obviously can’t add syrup.

This article is about circular moves on the Sinumerik Siemens 840D.

Now we all know on a Fanuc it’s end point and rad (piss easy you say) and Heidenhain, well they have a lot of ways too actually.

The Germans have got this circular milling business fuckin nailed.

Siemens 840D

Gadgets

When you’re a real geek like me you just keep looking for more and more things that a control will do.

On the Sinumeric Siemens 840D it’s never ending.

Sometimes I think “shit that’s amazing” and even though I can’t think of a use for whatever it is I found. I can’t help but think maybe one day I will. You know like that bread making machine you bought that’s at the back of the cupboard.

But it’s like they cover every option and permutation you will ever want.

For example this video shows how you can simply add a radius to a corner. You just program it point to point. It’s a 50mm square so you program it to X50. Y50.. Then when you want rads on the corners you just stick them on the end.

The smart arses are now saying “so what, I can do that on my Fanuc”. (I say “good luck with that one”)

Heidenhain is easy you just add RND

Ok so here is a video showing you how.

Type 1 Corner Rounding Siemens 840D

Now I know what you’re thinking (“so what”). But what if you wanted a different feed-rate on the corner radius?

Easy just add FRC=50.would give you a feed of 50mm per minute just on the corner radius and it wouldn’t affect your other feed.

Stay Tuned It Gets Better

So your program looks like this

G41 X0 Y50.
X50. RND=20.
Y-50. RND=20.
X-50. RND=20.
Y50. RND=20.
X0
G40 X0 Y65.

Simply add FRC

G41 X0 Y50. F200.
X50. RND=20. FRC=50.
Y-50. RND=20.
X-50. RND=20.
Y50. RND=20.
X0
G40 X0 Y65.

Oh and if you want it to apply to every corner you don’t need to write one on every line just add M. Cool what.

G41 X0 Y50. F200.
X50. RND=20. FRCM=50.
Y-50. RND=20.
X-50. RND=20.
Y50. RND=20.
X0
G40 X0 Y65

Oh and you can do the same with the RND just add M

G41 X0 Y50. F200.
X50. RNDM=20.
Y-50. 
X-50. 
Y50. 
X0 RNDM=0
G40 X0 Y65

Then RNDM=0 will cancel it.

Type 2 Endpoint and Radius Siemens 840D

This is how you do it just like Fanuc n Haas


I mean really it’s not much different to fanuc and Haas except instead of just putting R20. you have to put CR=20. these Siemens guys love those equals signs they seem to want them everywhere.

Type 3 Tangential Rads Siemens 840D

I love this one (Heidenhain do it too) all you do is give it two points and it just sticks in a tangential rad.

Oh by the way if you think there is more than one size tangential radius between two lines then you should be absolutely ashamed of yourself.

It’s all done with a simple CT don’t you just love it this is soo damned exciting.

Type 4 Angle Siemens 840D

This one is amazing you just program a radius and the angle.

Type 5 Using I and J Siemens 840D


Siemens 840D

Proceed At Your Own Risk

As much as I don’t like to swear in my articles I’ve got to say I fuckin hate I and J as a way of circular interpolation.

There I’ve said it.

It’s pointless, it’s outdated and it’s utter bullshit.

The only time I would ever use I J and K would be to machine a full circle. Other than that I would rather extract my own wisdom teeth with a hammer and chisel.


There it is. The I and J are an incremental distance to the centre of the circle from where you are. Oh and because Siemens is so versatile you can even program I and J as absolute values from your datum.

If you find the above statement confusing then good. It serves you right for using a completely useless outdated way of programming a simple corner rad.

So now you know what I mean. Joking aside, these methods are all tools in your programming toolbox. One day you’ll see a use for one of them and you’ll think “I remember that grumpy old bastard wrote an article on that”.

Then I hope you’ll return to this article.

Thanks for watching and reading

If you have been affected by any of the issues in this post or need CNC Counselling then contact me.

Or call us

If you want to learn to program CNC Milling Machines

Look no further Contact CNC Training Centre


Siemens CNC Mixing MM with Inches

Siemens CNC Inches and Millimeters (Do you switch?)

CNC Training Call David: 07834 858 407


CNC Training Centre Reviews

30 five star ratings on Google (Just saying)

I remember a long time ago we used to run metric programs and imperial (inch programs). So if the drawing was in inches then that’s how we programmed it. Seemed like a good idea at the time no converting figures and no need for writing on drawings.

Siemens CNC

You had an inch drawing, inch micrometer so why not have a program that’s in inches too?

One day someone (not me, honest) changed an X figure by 1 inch thinking it was a 1 mm.

The difference between one inch and 1 mm is what we call a country mile or a shit load. Anyway the part flew out the chuck on the impact of hitting the tool.

G20 was assigned to our history book. Oh and the boss shoved the broken tool up my arse.

I often work in Scotland where there are a lot of engineering companies specialising in Oil and Gas type work. As a result most of them work exclusively in inches. To be honest to me it’s a pain in the arse and I never quite get used to it. Although when I did my apprenticeship at Rolls Royce in 1971 things were just changing over so in theory I should have a brain measured in inches (it wouldn’t be many by the way).

Metrification (it’s not a new sexual identity)

I need to be careful here, because I’m now at that age where you can bang on for hours about all this kind of innocuous shit (it’s what old men do apart from pissing themselves if there’s not a toilet nearby).

If You Must

To change to inches on a Fanuc control select MDI and go to your setting screen, press the offset/settings button.

Just change from 0 to 1.

Siemens CNC

Siemens CNC

Shut your machine off and back on again then zero return it if required. Everything will change to inches (you’ll now have four decimal places)

“Read More”

Onsite Doosan CNC Training UK – Hands-On Courses

Onsite Doosan CNC Training UK – Expert Hands-On Courses at Your Facility

In the competitive UK manufacturing sector, your Doosan CNC machines are key assets for delivering precision turning, milling, and multi-axis work. But to get the absolute best performance from models like the Puma series lathes, Lynx compact turning centres, or DNM vertical machining centres, your operators and programmers need targeted, practical skills.

Call David: 07834 858 407

CNC Training Centre Reviews

That’s where CNC Training Centre excels: we provide onsite Doosan CNC training right on your shop floor – no travel, no lost production time, just real results tailored to your exact machines and workflows.

Why Onsite Doosan CNC Training Delivers Superior Value

Doosan machines (now known as DN Solutions) have earned a stellar reputation in the UK for their durability, high-speed capabilities, FANUC controls, and versatility across industries like aerospace, automotive, medical devices, and precision engineering.

Yet the biggest untapped gains often lie in operator expertise.

  • Zero production disruption – Training happens where your team already works, using your specific Doosan lathes, mills, or multi-tasking centres.
  • Hands-on with your reality – Practice on your actual fixtures, tooling, programs, and materials – far more effective than offsite or generic simulators.
  • Fully customised sessions – From foundational operator safety and setup to advanced Doosan programming training onsite, live tooling, Y-axis, sub-spindle ops, probing, and cycle time reductions.
  • Quick, measurable ROI – Teams apply new skills immediately, slashing scrap rates, shortening setups, minimising errors, and increasing output.

Onsite Doosan CNC Training


Investing in premium Doosan machine training onsite empowers your workforce to fully exploit the reliability and innovation built into every Puma, Lynx, or DNM model – helping you stay ahead in a skills-short UK market.

What Our Onsite Doosan CNC Training Includes

Every course is built around your Doosan lineup and production goals. Core topics typically cover:

  • Safe operation, daily checks, and preventive maintenance
  • Rapid, accurate setup and workholding strategies
  • G-code mastery plus conversational and Manual Guide i programming techniques
  • Toolpath optimisation for turning and milling efficiency
  • Advanced capabilities: live tooling integration, multi-axis machining, in-cycle probing
  • Common troubleshooting on Puma CNC training onsite, Lynx Doosan training, DNM machining centre training, and similar models

Delivered by seasoned instructor with extensive Doosan experience, our sessions provide industry-proven insights you can trust.

Onsite Doosan CNC Training

Ready to Maximise Your Doosan Investment?

Don’t let under-skilled operators hold back your high-performance Doosan CNC machines. With Doosan CNC training from CNC Training Centre, you’ll see faster setups, better part quality, reduced downtime, and a more capable team – all without anyone leaving your premises.

Call David: 07834 858 407

CNC Training Centre Reviews

Your Doosan machines are built for greatness. Let’s ensure your team is too.

Expert onsite Doosan CNC training – practical, effective, delivered where it matters most.


Siemens Program Training Cool Siemens Stuff

CNC Training Call David: 07834 858 407

CNC Training Centre Reviews

This Article is About TOFFR

TOFFR….  No it’s not some kind of vegan substitute for cheese.

It’s a programming command on a Siemens 828 or 840 Sinumerik Control.

Now everyone who reads this crap knows that I usually start the articles about Siemens Program Training by saying how versatile they are.

Well today I’m not going to. Instead I’m going to show you a picture of the fly I bought from a local pet shop.

Her name is Tinkerbell.

“I want to buy a pet fly” I asked. “We don’t sell them” said the shopkeeper.

“Well there are quite a few in the window” was my reply.

I then forced him to sell me one for £25 (that taught him a lesson, I think he was afraid I’d call in trading standards)

Siemens Programme Training TOFFR

I could talk about Tinkerbell all day, but I’m not going to, Iv’e written this amazing article all about TOFFR it’s the Siemens vegan option.

Let’s imagine you want to machine around the outside of a shape. You want to rough it and leave material on. So what do you do?

Two Programs?

Do you have two programs one bigger shape for roughing and one that is the correct finished shape?

No you use TOFFR

What TOFFR does is modify you tool radius in your offset file.

Firstly you add some to it.

TOFFR=1. (Add 1mm)

Run your program which will leave 1mm on the size.

Then…

TOFFR=0 (Sets it back to it’s original amount)

Run your program again this time the tool is back to it’s correct radius and will therefore finish the part.

Take a look at the code below.

WORKPIECE(,””,,”BOX”,48,0,10,-80,-52,-52,52,52)
G40 G94 G64 G90

T=”CUTTER 12″
M6
D01
G54 G94

G0 X58. Y0 S1500 M3

Z-10.5
M8

TOFFR=1.;Add 1mm to radius

SHAPE:
G1 G41 X48.Y0 F1500.
Y-48.RND=10.
X-48.RND=10.
Y48.RND=10
X48.RND=10.
Y0
G40 X58. Y0
ENDLABEL:

TOFFR=0;Reset Radius

REPEAT SHAPE

G0 Z50
M17

Let me explain what’s going on here.

This line:

TOFFR=1.;Add 1mm to radius

Will add 1mm to the active tool radius so you mill around the part leaving 1mm of extra material.

Then this line:

TOFFR=0;Reset Radius

Takes the 1mm back off so when you repeat the section of code with this line.

REPEAT SHAPE

It finishes the shape.

Here is a nice video I made.

Oh and if you want to know about repeating sections of program  and subprograms read this.

Thanks

If you feel you have been affected by any of the issues raised in this post or need CNC Counselling then contact me.

If you want to learn to program CNC Milling Machines

Siemens 840D Sinumerik training

Look no further Contact CNC Training Centre


Careers in CNC

View all current vacancies in CNC

Click here

Call David: 07834 858 407