At CNC Training Centre we have CNC Training Classes to suit everyone. From an absolute beginner to more advanced programmers who want to learn Macro Programming
Here is a list of all the CNC Training Classes we currently offer
Rads and Chamfers Fanuc, yes you heard it there is a quick way of doing it just like on Heidenhain.
On a Fanuc control they offer two ways of adding rads and chamfers, one is pants and the other one is great.
It really is a pain in the arse to get some of these features working but it’s definitely worth the effort to sort it out. Read this article and get to work. Your life will never be the same.
The first way uses R and R- or K and K- depending on which way your going. Now I won’t be explaining how this works because really I haven’t got a fuckin clue
It’s way too complicated. If I did know I wouldn’t waste wearing out my keyboard or damaging my manicured nails to write an article.
Anyway it will only do orthogonal lines (if you don’t know what orthogonal means don’t worry it just means your a bit thick).
This by no means implies that I think all goats are stupid (technically known as goatism).
Let’s learn to Convert Manual Guide programs into normal vanilla CNC Code.
Manual Guide i is very popular now on Fanuc Controls. I’ve got to be honest I’m not a great fan. There are parts of it that are very useful. But anyway knowing me I’ll probably change my mind.
I do work in some companies that just use manual guide and nothing else. One such customer got me in to do some training and also helping to develop an Edgecam post for a Toshiba Machine with a Fanuc Control.
As part of the development of the post I needed some sample code. Well they didn’t have much so I decided to convert one of the Manual Guide Programs to a standard CNC Program so I could see exactly what code it was using.
Change Your Underwear Regularly
My thoughts were that I’d forget how to do it as it’s not something I do that often. You know it’s a bit like changing your underpants, if you don’t do it too often you can forget how and then somehow you just avoid it.
Anyway here’s what you do. (Convert Manual Guide not change thongs)
First of all call the program in the Edit Mode. Reset to the head of the program. Then change to Memory mode or Auto.
If you press the side arrows eventually you’ll see a button called NC CNV.
You can only do this in Memory mode, if you are in Edit you’ll never find the button!
Press this and you will be asked to input a program number.
Enter a new program number and press CREATE.
I you use an existing program it will be overwritten so be careful.
You will now see the same buttons that you use for simulation.
If you press the START button.
Your program will be converted and you’ll see all your code in your new program.
(You can stop and pause and all sorts of other shit if you want.)
Press STOP
and then RETURN
Once you press RETURN your all done and it will take you back to your original program.
NOTE
DON’T FORGET YOU NEED TO BE IN MEMORY MODE FOR THIS TO WORK.
(I didn’t and I’m still seeing a therapist having nightmares about trying to find the convert button)
I even headbutted the control.
Thanks for watching and reading
If you have been affected by any of the issues in this post or need CNC Counselling then contact me.
Or call us
If you want to learn to program CNC Milling Machines
This article is about using G10 on a CNC Lathe to set the work shift or work zero offset as it is known on a Haas control.
If you have ever used Mazak machines you will know that when you call a program the work offset is kept with it.
Obvious really……
I mean if you were teaching your dog or your cat to program a CNC Lathe and you told him that he had to reset the workshift every time he called a new program what would he say.
I mean nothing really but he’d probably give you a strange look.
But you can do it on a Fanuc control or on a Haas control.
You just put this………………….
G10 P0 X0 Z-98.1
So you would put that at the head of your program and it would change the work shift screen as above.
Advantages
No need to set workshift everytime.
Automatically sets X figures so there’s no chance you could alter it by accident.
Well there is a slight catch.
It’s obvious really but from now on you can only change the workshift from the program.
If you altered it on the workshift screen it would just change back when you run the program.
Now I know your not stupid enough to do that but I bet the bloke on nights is.
This article is about the Workshift on a CNC Lathe with a Fanuc control.
As a beginner one of the first things you will need to learn is how to set the workshift.
The workshift is an adjustable figure that tells the control where the work zero is.
It defines the relationship between the turret and the workpiece.
So we have a programme for our part on a our CNC Lathe. Let’s assume this programme is perfect with no errors.
But at the moment it’s just a part floating around in space.
You have measured the tools using cut and measure or a tool presetting arm. You also need to tell the machine the radius of the cutting tool tip and its virtual nose position.
Tool tip radius and virtual nose
So now all the machine needs to know is where the workpiece stock is. That’s where the workshift comes in.
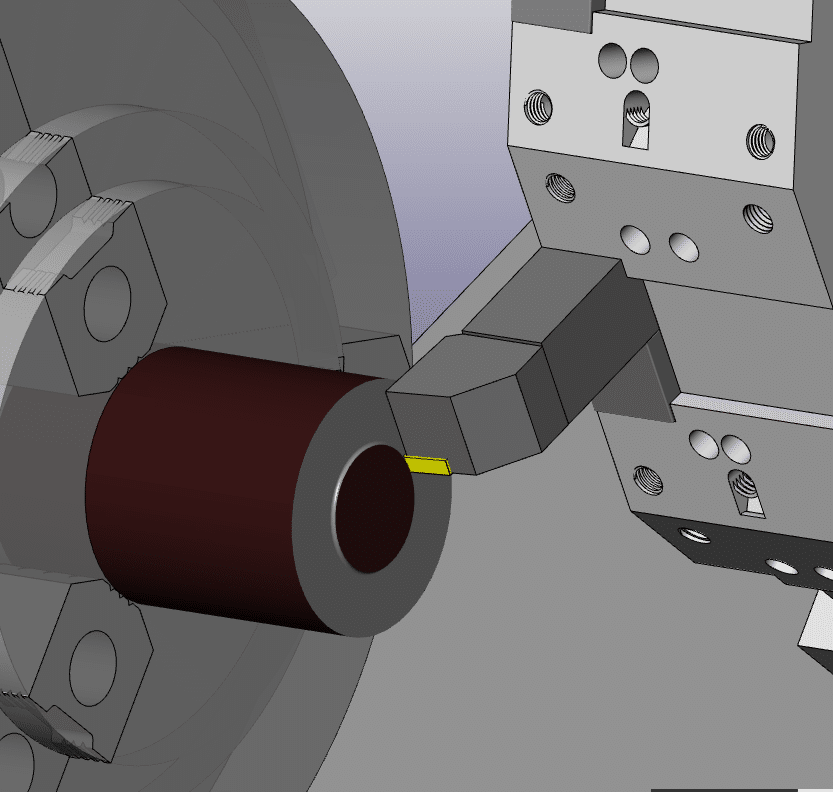
Bring the tool to the front face of the component. If you want to machine metal from the front face then you would position the tool slightly behind the front face.
You could even start the spindle and machine the front face. That way you will know you took off the right amount of metal.
Machine the front face when setting workshift
(You can use any tool for this provided it has been measured and you call its offset)
Cursor to the Z underneath (MEASUREMENT) on your workshift screen.
Type in 0 then press INPUT
The Z SHIFT VALUE will change.
If you want to you can input zero into shift value on the left to reset it before you start.
I like to do this when I am setting the workshift because you can clearly see the new figure when it goes in.
My screenshots are from newer Fanuc controls. Even if yours is an old banger it will be much the same.
Be very careful not to set anything in the X figures because it will completely mess up your X axis position. This could leave you in deep shit.
It is always good to note the X figure even if it is set to zero.
This X figure can be used to set the centre-line for your drills and centre cutting tools so it may not be zero.
Mine is set to X270. which is the centreline of my machine. So if I am using a drill or any tool that works on centreline then I only need put zero in the X offset.
Be careful before changing this if you have a tool measurement arm as it will alter all your X figures. You will need to re measure all of your tools.
In the table above tool 9 is a drill and because my workshift is set to the centreline (X270.) I would input zero in the X offset geometry.
Otherwise you would have a standard figure that you put into X for all your centreline tools.
On my machine it would be 270. but it usually ends up at something close like X270.106 which is hard to remember.
I often see this figure written on the side of the machine in felt tip pen for operators to remember.
If you do have a figure in the X it is really important not to change it. I would recommend using G10 in all your programmes. That way you can always be sure this figure is correct.
(G10 is a way of entering your offsets and workshift from the CNC Program)
In the program above it is the G10 P0 X270. line. The P0 tells the control to write to the workshift.
This way even if you fuck up the X position the control will just ignore you and keep writing the correct figure in at the beginning of the program.
Please note I am not putting anything in the Z for the G10 as I don’t want this updating. You can do this if you want, but you need to remember that you can now only alter the Z from the G10.
Testing The Workshift
Once your workshift is set you are ready to prove out your part.
You can test the workshift in MDI if you wish.
T0101; G0 Z0;
Make sure to override the rapid moves (not 100%) and look at
DISTANCE TO GO
If when you run your program the front face of your part does not clean up or you feel you are taking too much off then the workshift will need to be altered.
Note
Changing the workshift moves all the tools together. I does not change the relationship between the tools.
How to Alter The Workshift
Always use + INPUT as this will add the value to the present value.
If you use input it will replace the figure and now your in trouble.
How to Adjust workshift
Be Careful Not to Alter X
Thanks for watching and reading
If you have been affected by any of the issues in this post or need CNC Counselling then contact me.
Or call us
If you want to learn to program CNC Milling Machines


 Tool Presetting Arm