Onsite Training Retro CNC Boko In Scotland

CNC Training Call David: 07834 858 407

CNC Training Centre Reviews

Onsite Training In Scotland

I was recently allowed into Scotland. My visit was to Abacus Valves in Glasgow, onsite training on a Boko with a retro fitted Heidenhain control.

It is rare for me to get repeat business but this just proves there is one customer out there who actually likes me. No law suites, no fights on the car park and no refund issued.

For those who don’t get the irony in my articles and might be getting a bit nervous right now, here are my ratings on google

I got the pleasure of working on this machine.

Onsite training with no manuals at all except for a generic Heidenhain 426 manual. The company that built this thing, well retro fitted the CNC bit, went out of business when to be sick meant to evacuate the contents of ones stomach and “Jim’ll Fix It” was a popular children’s TV show.

Onsite Training

Programming it with Heidenhain is no problem. Minor details like switching it on or moving it around would be a bit like driving a Sherman tank blindfold with your scrotum sack cable tied to the steering wheel. (Do tanks have steering wheels??)

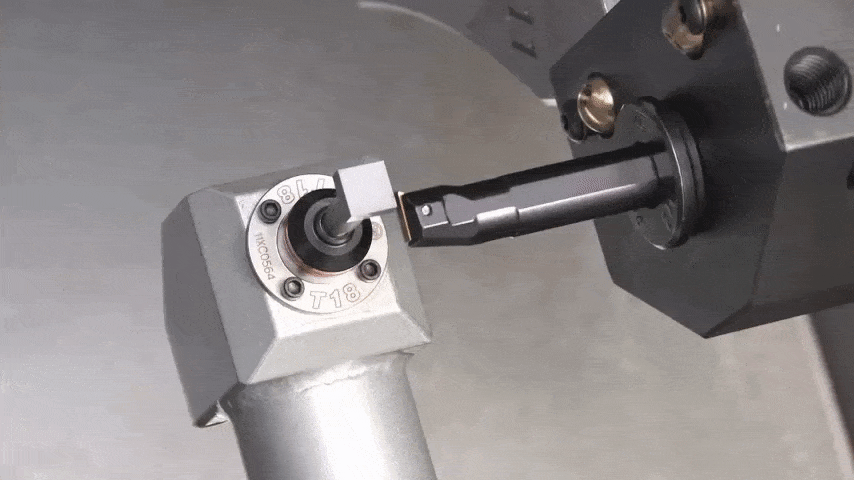
It’s a Boko vertical machine that has a retro Heidenhain 426 CB control.

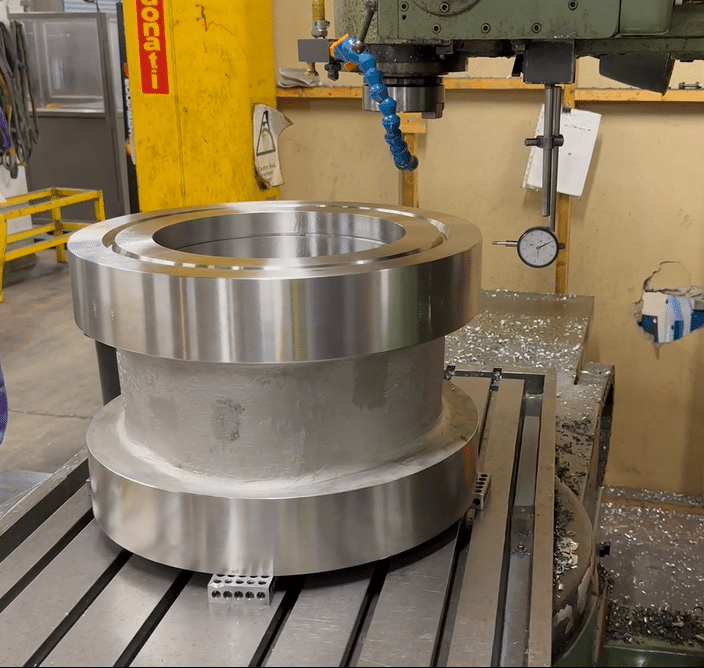
It’s used to make large valve bodies like this. To be honest I can’t remember when I had so much fun and kept my clothes on. Please don’t dwell too much on that thought, this is a septuagenarian speaking.

Onsite Training

These guys were an absolute pleasure to work with constantly making me cups of coffee and offering tasty snacks like this.

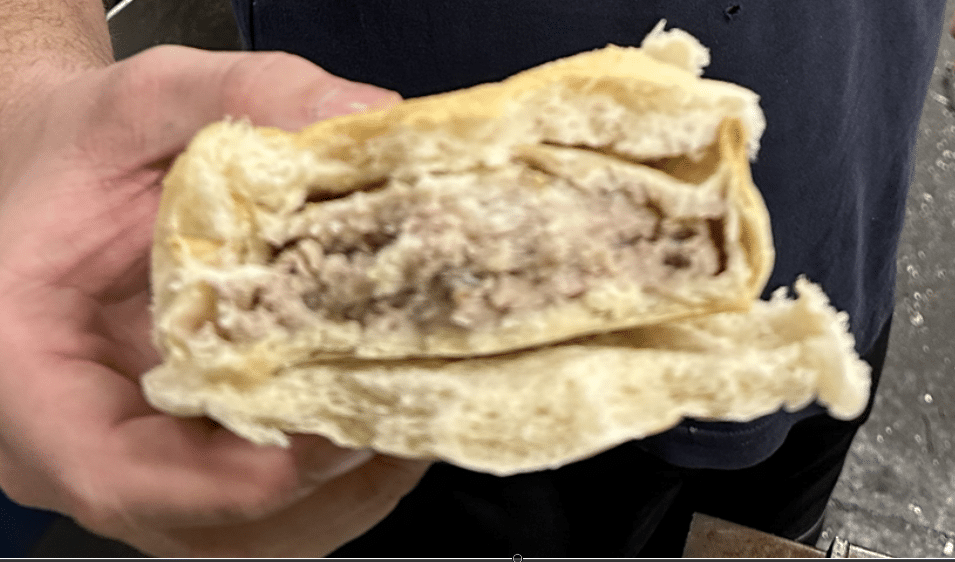
Children be warned “do not take pies from strange men especially this one”

I’ve got to watch what I say here cos these guys constantly take the piss out of not just one another, but include me. The first day of training everyone is always on their best behaviour. By the third day one of us, often me manages to lower the tone and the banta begins.

I think the above treat is some kind of Glaswegian delicacy (and there a many)

It’s actually a pie between two haves of a bread batch, mmmm.

I didn’t eat one to be honest but only because at the moment I’m on a strict diet, I’ll spare you the details. I recon one bite of this beast would constitute the average male calorie intake for a year.

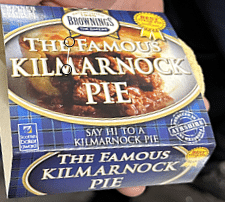
Anyway it’s lovely to be offered, last time it was tattie scones

and these really are nice.

“Read More”

Heidenhain Programming

Heidenhain Programming

Heidenhain Programming

CNC Training Call David: 07834 858 407

CNC Training Centre Reviews

(Read to the end for Heidenhain Programming tips)

The Heidenhain control is very easy to learn because it gives the operator prompts right from the outset. Follow these ten easy Heidenhain Programming steps to create your first working CNC program.

(1) Start your Heidenhain Programming. Heidenhain Programming input a Program Number when asked. On starting a new program you are asked if you want millimetres or inches.

(2) Create some stock for the graphics. You go on to create what is known as a blank form (BLK FORM). This is optional but is the blank shape for the graphics.

The first figure 0.1  is the bottom left hand corner and the second figure 0.2 is the top right. Take your datum figure into account when you dimension the blank.

Heidenhain Programming

This is a blank 110 x 110 x 10 and the datum is in the centre. If your datum was in the bottom left hand corner then it would be like this.

Heidenhain Programming

Hope this does not confuse you but I will be machining a 100mm square so this blank would leave me 5mm all round and you will see it removed when the graphics run..

Now we Need A Tool

(3) Define the tools to use. Heidenhain Programming

Heidenhain Programming

Above is the tools defined in the programme. The length has not been put in yet.

In Heidenhain programming tool offsets can be defined inside the program, which is traditionally how these controls worked. You can have them in an external file the same way as Fanuc and Mazak controls. These offsets are controlled from outside of the program.

In Heidenhain Programming work offsets (datums) again can be embedded in the program or external. If you use the external work offsets then each one has a number that you can call out to use it. It’s a bit like G54 to G59 on a Fanuc Control

It’s All So Easy On This Control.

You can just zero the display to set your datum position if you wish.

There is an advantage to everything being self-contained within a program. It means that when you recall the program everything is set and ready to go. Tools are defined in the program using the TOOL DEF button and you can either define all tools at the beginning or on the fly as you use them.

If your machine has an automatic tool changer the these will usually be in an external table.

You’re doing Well, So Far so Good

(4) Get the tool.  Heidenhain Programming

Heidenhain Programming

Call Tool 1

The tool call button will ask for a tool number and a spindle speed which you input. Once this line is read the tool is active. You may need to add an M6 if you have a tool changer. The M6 will instigate the tool change in this case Tool 1.


(5) Make a move to where you want to drill your first hole.  Heidenhain Programming


Heidenhain Programming

At the end of this line 5 you will need an M3 to start your spindle. The second line 6 brings your Z axis down to the component (3mm above).

Linear moves are programmed by using the L key which then prompts the operator for and X Y and or Z input. As you enter each figure you are prompted for the next input. It doesn’t take long to get the idea of how this is done.

Later controls have help screens.

After the XYZ input you are prompted to choose for RO RL or RR which is the choice of cutter compensation cancel or compensation to the left or right. You won’t need this because you are only drilling holes. So skip it or use RO.

There is no actual rapid on these controls you just program maximum feed (F9999). On the newer controls there is a FMAX soft key which does this for you.

You can input all the values in a line or press the END key which will complete the line. I recommend you play around with different keys to get the hang of how it all works. You can then just delete the program and have a go at a real one.

“Read More”

CNC Crashes ** Think The Unthinkable

Category : Useful Stuff

CNC Crashes ** Think The Unthinkable

CNC Training Call David: 07834 858 407


CNC Training Centre Reviews

30 five star ratings on Google

Every CNC Setter, every CNC Operator, every CNC Programmer they all have a story about their worst CNC Crashes. I’ll tell you about mine in a minute. That’s not what this post is all about. Today I want to give you something to think about next time the unthinkable happens.

CNC Crashes

It all happened on a machine not unlike the one above, good old Mori Seiki work horse. I was so grateful of those bars on the door.

Centrifugal Force

An outward force on a body rotating about an axis, assumed equal and opposite to the centripetal force and postulated to account for the phenomena seen by an observer in the rotating body.

Bloody hell! Anyway what I did (like a bloody turkey) was to put a manual chuck inside a power chuck on a CNC Lathe. Worked great that was until the speed clamp stopped working.

G50 that is (oh and here is an explanation of that).

When the machine faced off the part in G96 (see explanation) the spindle accelerated up to its maximum RPM. This was about 3000 revs. Now when a power chuck gets up to that kind of speed the centrifugal force starts to force the jaws open.

https://www.youtube.com/watch?v=x14poOHTXlM

Well if you are holding a manual chuck in there you are in deep shit, and I was. The manual chuck came out ripping off the power chuck soft jaws. Oh and for good measure it took off the machine door. I have never been so scared since my hamster bit me when I was six years old.

People say to me all the time an expression I hate “human error”, mmm. Nope sorry that will not do. It actually was a catalogue of cockups.

  1. Although G50 is modal  you must have one at the beginning of every programme. Even if it’s not needed set it to the maximum RPM of the machine.
  2. Never never put a manual chuck inside a power chuck.
  3. Power chucks need regular servicing to maintain optimum pressure.
  4. Never stand right in front of the chuck, try to stay to one side of it.
  5. Never remove machine interlocks.
  6. Wear two pairs of underpants if you think you might mess yourself.

The Solution (CNC Crashes)

At the CNC Training Centre we offer to help companies make productivity improvements. When we do this I talk about ways to make things stick. That is what you need to do after a collision. Implement solutions so that this particular CNC Crash cannot be repeated.

When CNC Crashes Occur.

CNC Crashes

  1. Get everyone involved together and fully analyze what happened.
  2. Make lists of all the errors and mistakes.
  3. Make sure everyone knows it is not about apportioning blame.
  4. Make it very easy for people to be honest oh and don’t forget torture is illegal under the Geneva Convention..
  5. Look at the things you can change. If someone forgot to do something then how do you automatically remind him. Maybe you can put something in place so he does not need to remember.
  6. For everything that went wrong introduce a new rule or procedure to make sure it can never happen again.
  7. Oh by the way it’s never human error where CNC Crashes are involved.

So let’s look at my example.

  1. Put G50 in every programme on the first line. Go through all the old programmes and do this.
  2. Maintenance programme for chucks and dated sheets on the back of each machine.
  3. Training sessions to explain exactly how G50 and G96 work.
  4. Videos are excellent for training as they cannot be altered. Word of mouth is unreliable.
  5. Training sessions to explain about modal G codes.
  6. Be sure to create an environment where people can comfortably own up to making mistakes. (Not an easy one).
  7. Centrifugal force, what’s that all about?

Thanks for reading this article and don’t forget the most important thing is your personal safety and the safety of others.

Services offered at CNC Training Centre

Edgecam Training.

Classroom programmer training.

Onsite CNC Machine Training.

CNC Training on all controls and machines.

Mazak Training Fanuc Training

Don’t forget we offer training on all types of Mazak Machines and all Fanuc Controls 6m to 31i Oi old to young.


Siemens Using RND

CNC Training Call David: 07834 858 407


CNC Training Centre Reviews

30 five star ratings on Google (Just saying)


CNC Lathe Tool Nose Radius Compensation

Tags :

Category : Fanuc Turn Haas Turn

CNC Lathe Tool Nose Radius Compensation

CNC Training Call David: 07834 858 407


CNC Training Centre Reviews

30 five star ratings on Google


This video “CNC Lathe Tool Nose Radius Compensation” is a follow up from my previous video “Tool Nose Radius Compensation on a CNC lathe”.

When you use tool nose radius compensation on a CNC Lathe (that means we are using G41 and G42) you have to tell the machine where the cutting point of the turning tool is so that the correct tool path is produced.

On a CNC Milling machine the cutting point is the centre of the tool but on a CNC lathe there are numerous choices depending on how the tool is going to cut.

This is sometimes known as the virtual nose position or the Tool Cutting Point. It is usually shown in a square diagram like this.

CNC Lathe Tool Nose Radius Compensation

It is designated by a number from 0 to 9. On a Haas control this is under the column TIP on a Fanuc control it is usually under the column T although it is different on some controls.


You would be forgiven for thinking that T stands for tool and that it is the tool number (sorry it aint). Mmm I dunno the jury is out on this one.

CNC Lathe Tool Nose Radius Compensation


On the offset page your machine will need to know the X and the Z position of the tool. If you are using a Tool Presetting arm or you want to use tool nose radius compensation (and you definitely should) then you will need to input the Tip Radius under the R column and the Virtual Nose position under the T column or the TIP column on a Haas.


CNC Lathe Tool Nose Radius Compensation

So when you use CNC Lathe Tool nose Radius Compensation the computer will allow for the radius that you specify for your tool. The cutter path will also use the cutting point that you specify.

Below is a tool measurement arm. This can automatically measure a turning tool. It will need to know the type of tool in order to measure it in the correct part of the square. This boring bar would be a type 2.

CNC Lathe Tool Nose Radius Compensation

So here it is folks and remember……..


“Like***Share***Comment***and***Subscribe to my video channel”


Services offered at CNC Training Centre

Edgecam programming and training.

Classroom programmer and Setter Operator Training.

Onsite CNC Machine Training.

CNC Programming and Training on all controls and machines.

Mazak Training Fanuc Training

Don’t forget we offer training on all types of Mazak Machines and all Fanuc Controls 6m to 31i Oi old to young.


Careers in CNC

View all current vacancies in CNC

Click here

Call David: 07834 858 407